Hourly Attendance Overview
Organizing hourly programs involves:
- Setting up an hourly calendar
- Creating the classes
- Enrolling students in Hourly Programs
- Enrolling students into classes
- Taking Attendance in hourly classes
- Confirming the attendance claim - Admin
- Changing a claim - Teachers
- Granting a Claim Change Code - Admin
I. Setting up an Hourly Calendar
Hourly attendance cannot be kept on the same track and calendar as ADA attendance.
To set up a new calendar, please refer to our article on Setting School Calendars
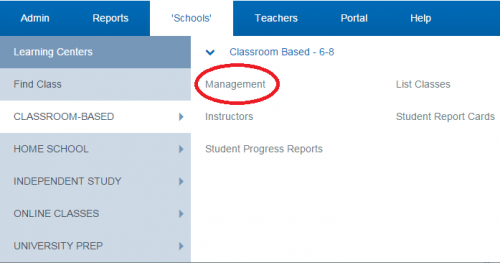
II. Creating the Classes
- Step 1. Click on the Learning Center tab (on your SIS, it may be listed as schools, academies, or something similar). Click on Learning Centers.
- Step 2. In the column labeled 'Links' click Mgmt.
- Step 3. Click List/Create Classes.
- Step 4. Create your new class. When you get to the attendance area, choose Yes/Attendance and the Educational Program check box you want to attach the hourly attendance to.
- Step 5. Set calendar for the class.

- Step 6. Click Save.
III. Enrolling Students in Hourly Programs
- Step 1. Choose a student from the student list and either click Enr at the right end of their row or choose enrollments from the quick view pop-up when you hover over the student’s name.
- Step 2. Click Create new enrollment record
- Step 3. Complete the enrollment record, make sure to include the Program you want to enroll the student into.
- Step 4. Click Save Record
IV. Enrolling Students into Classes
- Step 1. Click the Learning Center tab (This may be named something different in your scope. Ex. ‘Schools’.) Click on the name of the learning center you are working with. Then click Management.
- Step 2. Click List/Create Classes

- Step 3. Click on the Students: x of y (x=number of students enrolled in the class, y=number of seats available in the classes.) This will take you to the class roster.
- Step 4. Click on the green plus to add students to this class

- Step 5. Change the Educational Program to your Hourly program. Then click search.
-This will give you a list of students enrolled in the hourly program.
- Step 6. Check the box to the left of any student you want to enroll in the class then click Register Selected at the bottom of the list of names.
- Step 7. On this page, you can add additional classes to the students you selected by checking the box to the left of the class. When done selecting classes click Register Students
V. Taking Attendance in Hourly Classes
Be sure to use Firefox or Chrome as your browser.
- Step 1. Go to Learning Centers tab>your site>Instructors
-Teachers will only see their own set of classes on this page.
- Step 2. Click on Attendance under the class you are taking attendance for.
- Step 3. Click on the date on the calendar or on the appropriate CL in the ATT box to the right of the calendar.
If you lock the report and need to change something, you must call the office for a change claim number.
- Step 4. When you are finished claiming attendance, click save.
-You can still edit this claim until you click the “print form” link. Once that link is clicked a PDF will be generated and the report will be locked.
- Step 5. The form must be printed. The printed form must be signed, dated, and sent to the office for verification using the Form and Tracking numbers at the top of the page.
VI. Confirming the Attendance Claim - Admin
- Step 1. Go to Admin>Attendance>Admin>Confirm Attendance Forms

- Step 2. Put the Form Number and Tracking Number in the appropriate box then click the “I see a verified signature on the form” button.
VII. Changing a Claim - Teachers
Once a claim has been printed, it is locked. To unlock the attendance page, re-enter the page and call the office to get the change code.
You must enter the code immediately. Enter the code into the white box. You will then be able to change your claim and re-save, print, sign, and date.
VIII. Granting a Claim Change Code - Admin
- Step 1. When a teacher calls with an Authorization Request Number, go to Admin>Attendance>Admin>Attendance Change Authorization Codes
- Step 2. Type the Authorization Request code from the teacher into the Authorization Request field and click Grant. A new number will be generated.
- Step 3. Give that new number to the teacher. The teacher will enter that number into the Confirmation Code box. Remind the teacher to print, sign, and date the new attendance claims and send it to the office.
— Last Updated by Max Williams on 2016/03/08 19:35