Registering New Students
I. Create Student Record
- Step 1. Go to Admin»Student Info» Find/Add a Student
- Step 2. Choose Find/Add Student
- To find a student in the system
- Type basic info such as last name and click Search
- If you do a search on the student and no results are returned, no student by this name is in the system. If you see a list of students, make sure this isn’t a Re-Enroll. Re-enrolls should be updated!
- Step 3. Click Add New Student button
The student registration pages are broken into sections by tabs. The sections that have required fields are highlighted in red below (they will be represented by red asterisks in the SIS)
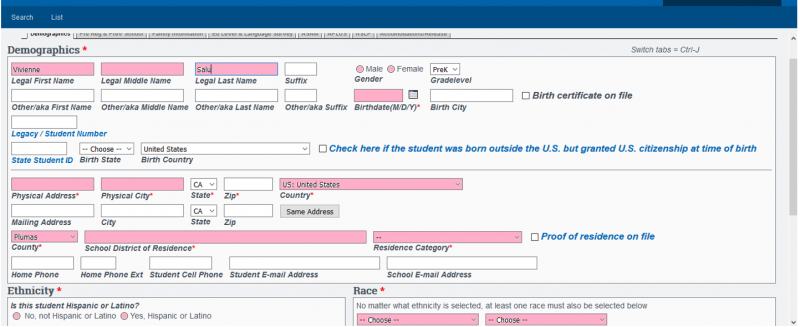
- Step 4. Go through all the tabs and complete all required information. This includes the following:
- Demographics tab (shown above)
- Pre Reg & Prev School: Parent education level and the first two English Language Survey questions are required.
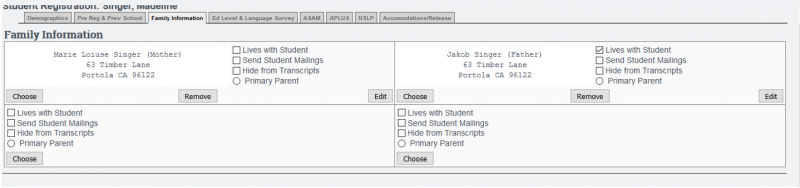
- Family Information
- Ed Level & Language Survey: Parent/guardian education level and language survey questions are required. If you only have information on one parent/guardian, choose “decline to state” on other parent/guardian. Can click “Set all values to English” for all English field entries.
- ASAM (optional - see school policies to hide or expose this tab)
- APLUS (optional - see school policies to hide or expose this tab)
- NSLP
- Accommodations/Release
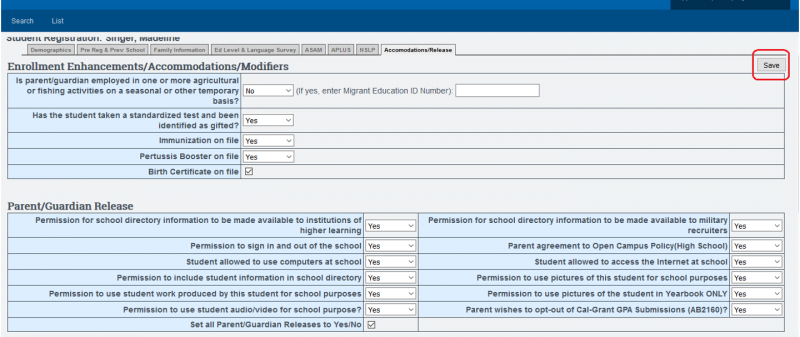
- Step 5. SAVE record. If the student is NEW, the SAVE button is on the last tab. Once the initial registrations have been saved, a SAVE button will appear within each tabbed area.
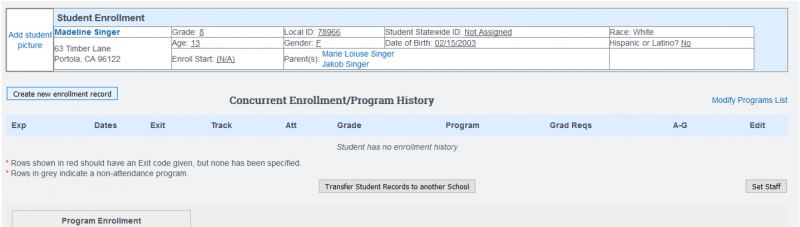
If you stop the process at this point, the student will be registered in the school but not yet “enrolled.” This student would be viewed on the main student list highlighted in red and be part of the intake roster
II. Set Enrollment
- Step 1. Click on Set Enrollment. If the student was previously enrolled, you will click on Edit to update the record.
- Step 2. Click the Create New Enrollment Record button
- Step 3. Add required information.
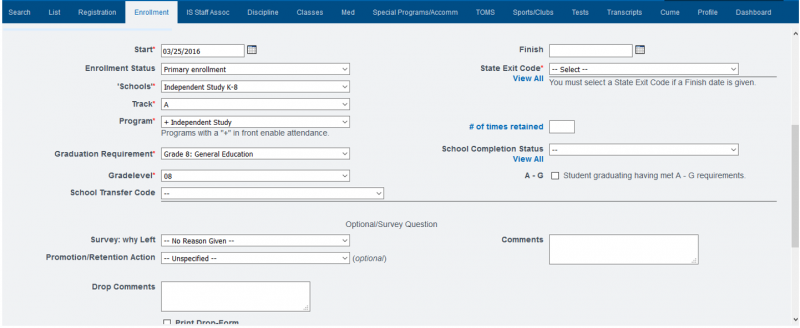
- Start Date (enrollment date)
- Enrollment Status (Primary)
- Learning Center
- Track
- Program (usually +Independent Study, +Modified Independent Study, +Classroom Based)
Programs can be added in Admin»Settings»Programs. If program type does not have a “+” next to it, it is not a program for daily attendance. Those with a “+” will be shaded blue on the student roster. - Graduation Requirement for high school or category for other grade levels.
- Grade Level
- Click SAVE Record
- When a student is dis-enrolled, you will need to give a reason for the exit.
When you click an exit code number, a description of the code will appear below the number so you can make sure you chose the correct number. - Click Set Staff if the student is an Independent Study student using ReportWriter or PLS programs.
- Step 4. SAVE Record.
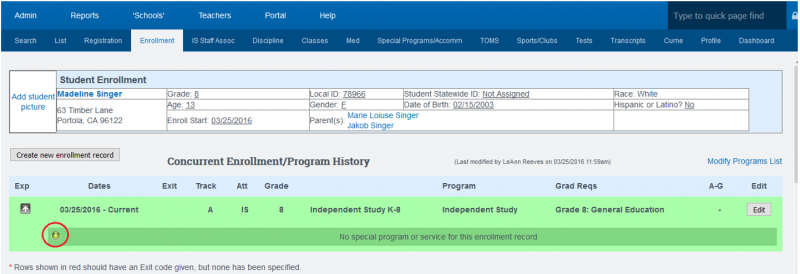
- Step 5. You will see the enrollment record you created. Green enrollment records are active. Grey are not.
III. Special Enrollments
- Step 1. Students can be enrolled in special programs such as Special Education, English Learning, Free Lunch, etc.
- Step 2. Click the Add Button
Choose the type of enrollment and enter the enrollment date. If you don’t see the special program you need listed, go to Admin»Settings»Special Programs to choose more
Depending on permissions, someone else at your school may need to complete some of this information under the Accommodations tab
- Step 3. SAVE- You can create multiple special program enrollments by clicking the green add button.
IV. Set Staff Associations
Only add a staff record for student if they are enrolled in ReportWriter or the PLS. Other staff associations will come from class enrollments/homeroom.
*Note: If staff record has not been set in the Info and Employment completely, (Admin»Staff Info» Staff List) the staff member will not appear.
- Step 1. Click ADD new assignment
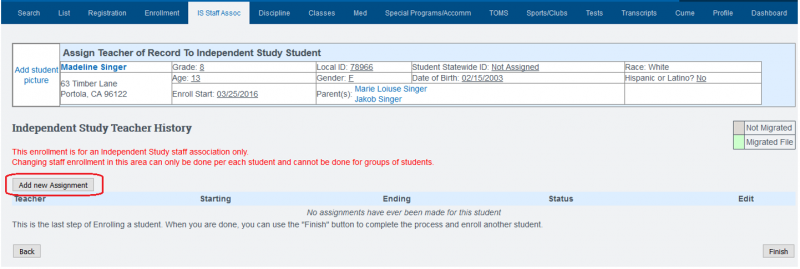
- Step 2. Click on the down arrow next to Working With field to choose a teacher
- Step 3. Enter the start date with this teacher

*Note: If you have entered preferred student zip codes, desired caseload, and notes on specific students in the staff record area, this information will be available to you when choosing a staff assignment.
- Click on Save Record
- Click Finish
Enroll students into classes. This can be done from a student’s dashboard or from the class registration area. See manuals on Enrolling students in BrainHoney-BUZZ Learning Management Center or CMS manuals
V. Adding Security Permissions
All students newly enrolled in the school must have security permissions set IF you are using the Student Portal. You must have access to security/permissions area to perform this function.
- Step 1. Go to Admin»Settings»Security»Define Security Group
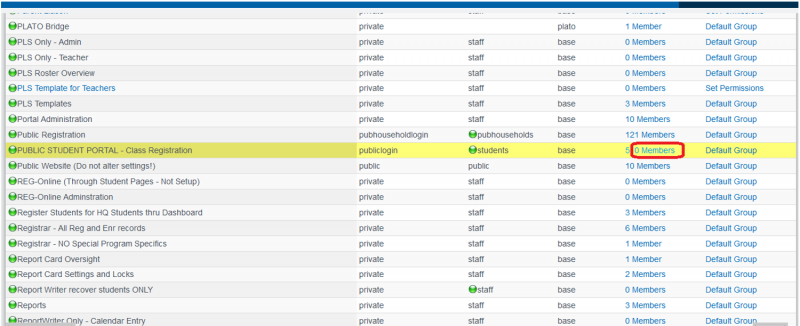
- Step 2. Scroll down to *PUBLIC STUDENT PORTAL (Choose the group with or without class registration depending on what your school is using.)
- Step 3. Click on Members for that group
Students on the left have the permissions granted to them. Students on the right have not been given the permissions to this group. Check any student on the right you want to move into the security group and then click SAVE CHANGES
If parents are also logging into the portal, they need permissions set also. Use the permission group *Parent Portal