Curriculum Sharing
Curriculum sharing is available to share with all School Pathways schools (schools). It is not limited to schools within your district. Curriculum available in Teachers>Manage Curriculum can be shared. Once the Curriculum Sharing function has been turned on – you will be using the Manage Curricula (Teachers>Manage Curriculum) function and the Bookshelf function (Admin>Settings>Bookshelf Settings). If you do not see a school you wish to share with listed in the Bookshelf Settings area, please contact your School Pathways Account Manager.
Sharing from a School:
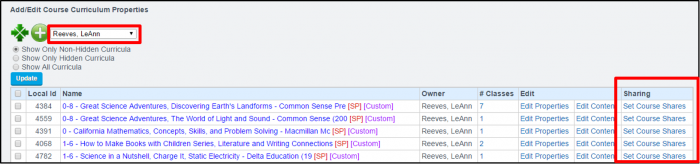
Location: Teacher Pages > Manage Curricula
- Search the Master Curricula by ALL (all staff at your school) or a specific staff.
- Under the Sharing column, click on one of the links to 'Set Course Shares' next to the curricula you want to share. You will later be able to choose more.
- Set up schools to share:
- To share curricula with a school, type in the scope name exactly as it displays on the browser bar for example: https://milestonehs.plsis.com would be typed in as milestonehs. This is typically done for you by School Pathways. Please call if you need assistance.
- Click on 'Add Share.' If you get an error, contact your School Pathways Account Manager to allow the school setting.
- When a school is added to share, the school will then display on the left side of the page under 'Currently Shared With'
- If you would like to remove a sharing school, you can click on the red X next to the school name and the curriculum will not be available to share.

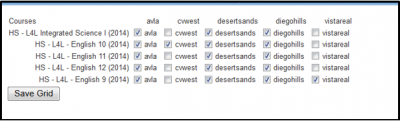
- Grid View:
Courses and schools can be mass shared or mass unshared by clicking on the checkbox next to the course title/school.
Importing Curriculum in the Receiving School:
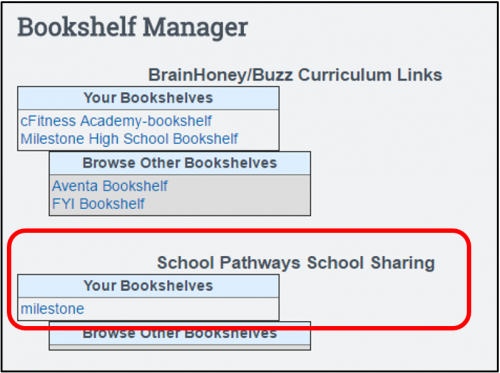
Location: Admin > Settings > Bookshelf Settings
- Below the title 'School Pathways School Sharing,' click on your sharing school link.
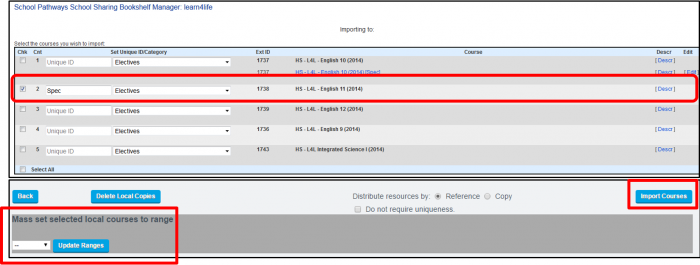
- Import Course:
- Check the course(s) to import
- Enter a Unique ID – examples of unique IDs could be words, letters or a combination of each.
- Choose the general curriculum Category the curriculum will be found in when searching.
- Set the Range. Some curricula may originally be personal while others are set to school. If you want to change all that are imported to a range, do that now and UPDATE RANGE.
- Distribute resources: Reference or Copy. This only pertains to curriculum imported from online sources.
- Click on the button ' Import Courses'
- Import Status
- A copy of the shared course has been imported into the receiving school.
Black – Shared / not imported.
Blue – Imported course. - Click on the 'Edit' link.
- Change the Range from Personal to School Name, in order for the course to be used by the entire school. Save.
Note: Other settings - Change create/owner – when the course is imported, it will be imported under the name of the user who is currently logged in. You may want to set the Creator/Owner to the actual creator of the course from the sharing school.


Review Curricula:
Teacher Pages > Manage Curricula
- Search the Manage Curricula by ALL or specific staff and 'Show All Curricula'
Note: the unique id is displayed in brackets after the course title. This is what the users will see when assigning curriculum.
