Grade Book: Assigning Work, Grading & Reports
Assigning work for PLS students requires using the grade book to assign modules with assignments attached. This allows for proper reporting of student work completion on the Assignment and Work Records (AWR) and Work Summaries (WS) and correct grade calculations on these and the report cards/progress reports.
Most users of the PLS use a pre-developed master curriculum laid out using modules, objectives, assignments and standards that makes assigning work much easier. But custom assignments can also be used. If students are taking classes, the classroom teacher might not understand how important modules, objectives, assignments, and standards are to personalized learning record keeping and we are working hard to get the message out.
With all this in mind, the emphasis of this manual will be assigning from curriculum with some comments on adding customized assignments.
A. Assigning work from master curriculum
a. Using “Quick Assign.”
- Quick Assign allows you to make assignments without opening the grade book.
- Click on the red grade book icon to the left of the curriculum name. The assignment area opens below the curriculum name.
- Choose one or more learning periods.
- Choose your assignments by clicking on the module or open the module using the green arrow to pick specific assignments. See detailed explanation below in step A.b.2.
- Click Assign to close the window.
- Click Assign & Grade to open the grade book.
b. By accessing the grade book
- Open a grade book using a module button in the student file for the curriculum you want assign. This takes you directly to the curriculum lesson plans if nothing has been assigned yet.
- Assign: Master curriculum is organized by module.
- Click on the green arrow to the left of the module to expand the module to view.
- Click on the module wording or the module folder to assign the entire module.
- Or click on individual assignments, objectives and standards to assign.
- Only assignments highlighted in blue are assigned. You can also unclick any individual item you do not wish to assign.
- You can re-assign any module again as long as it's not in the same learning period.
You can also assign from the module number buttons at the bottom of the page.
- Click Assign
- Once assignments have been made:
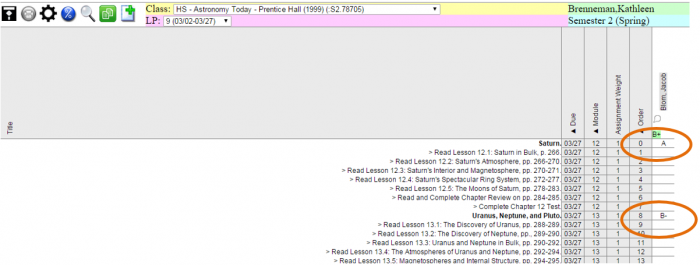
- Note that the module title has no ˄ in the name. Only assignments, objectives and standards have the ˄ symbol.
- All you have assigned is visible in the grade book. You might not want objectives (denoted with an asterisk) or state standards (denoted by their Standard code and #) to show. You can always hide these by clicking the options wheel and clicking to hide these items.
- Add a grade in the module line or in any assignment cell. Typically you would grade by either module or by individual assignment – not both.
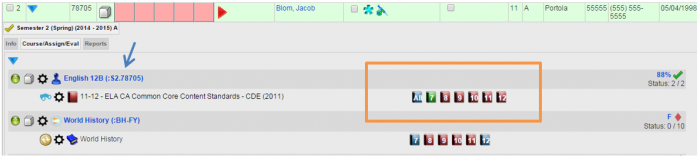
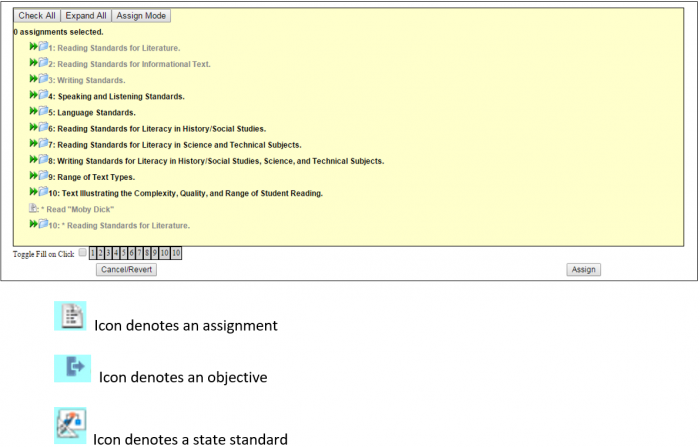
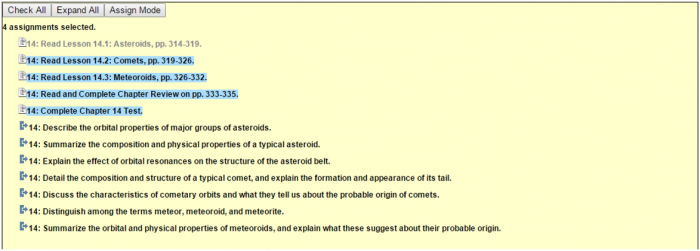
The view below shows
- Assignments, noted with a > before the assignment.
- Objectives noted with a >* before the objective.
- And standards noted by the standards code and number before the standard.
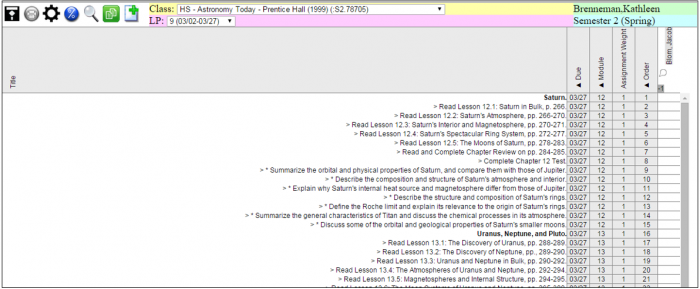
In this view, the module is graded and I have my grade book marks settings to show % grades. See the manual “Grade Book – Settings” manual for more information.
B. Assigning more from the same module
Sometimes you aren’t sure if you want to assign the entire module right away. If you assign a module and include 3 of 10 assignments now, then want to assign more from that module, it’s important to assign “through” the original module. An example follows.
- Assign one assignment in the first module by clicking on individual assignments. Click Assign
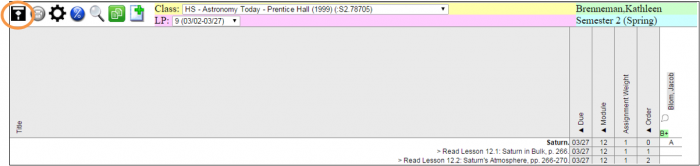
- Manually save the grade book using the save icon (you only have to do this if you are going to assign more work in this manual right away).
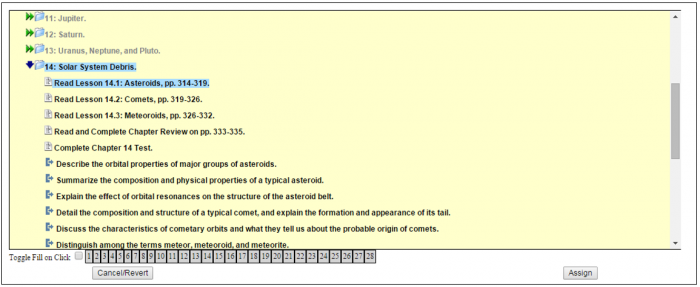
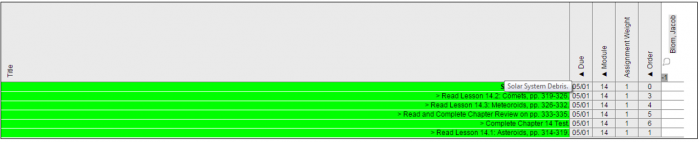
 \\You know you have a module and an assignment attached to that module because when you hover over the module “Solar System Debris” it highlights green as does its “child” assignments.

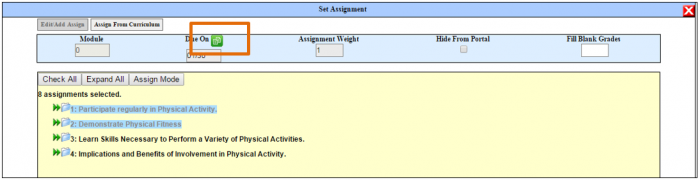
- Assign more from the same module by clicking on the module title (actually click on the green highlighted word “Solar System Debris,” or whatever your module title is).
- Add more assignments from that same master curriculum module by clicking on “Assign From Curriculum.”
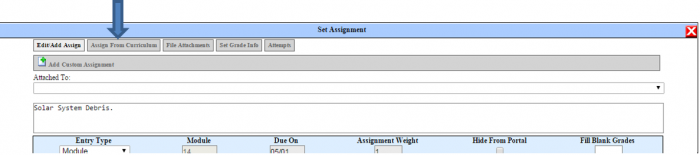
Choose your assignments and click Assign.
SAVE!!
Now when I highlight the “Solar System Debris” module, the extra four assignments added are part of that module. Anytime I want to add to THIS module, I click on the module title and add more assignments. This prevents you from having two modules with the same number and same verbiage (which will cause an error upon SAVE..
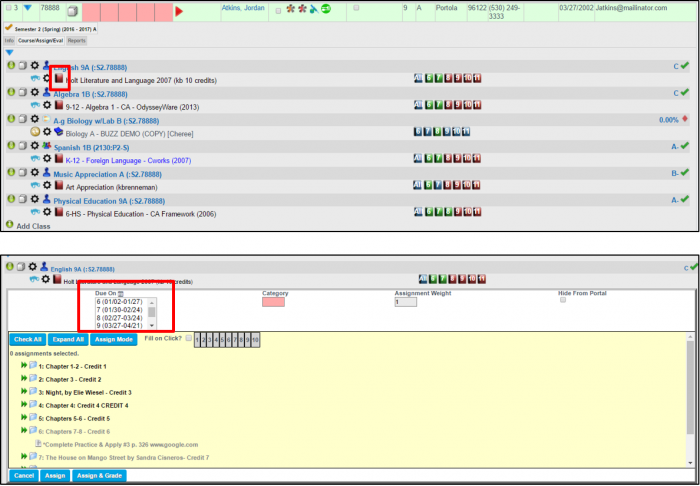
It’s important not to use a module title twice or a module # twice if they have the same due date.
C. Assigning custom assignments to the module
- Click on the module title (“Solar System Debris” in my example).
- Click on the Add Custom Assignment bar.
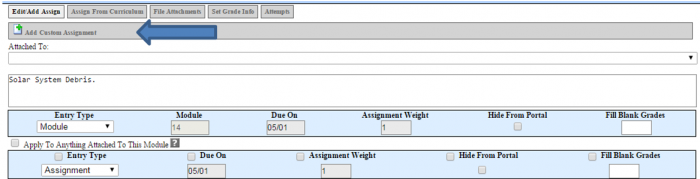 \\Custom assignments can be typed directly into the assignment box. Assignments can be simple such as “Personal Essay” or more descriptive such as “Write a personal essay at least three paragraphs in length.” The field will allow as many characters as you want to type.

- If you have your date range set of a specific LP, the last date of that LP will automatically appear in the due on date box. If not, ENTER A DUE DATE for your assignment(s). It’s much easier to do at the time of assigning then after the assignment is in the grade book view.
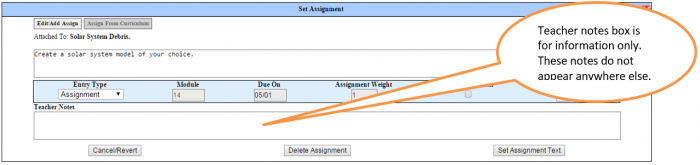
SAVE! Until the grade book is saved, the addendum to the module is not part of the module.
D. Assigning the same assignment to all future LPs
- Assign as usual but before you click the Assign button…..
- Click the COPY icon next to the Due On date.
- With the Ctrl key held down on your keyboard, choose any/all learning periods you want these assignments to be copied to. Make sure to still have your current LP highlighted.

- Click Assign.
- Save. All assignments will be distributed to the appropriate LPs.
E. Grading Student Assignments
Grade can be entered for any module, assignment, objective or standard in the grade book. Marks can be letters, numbers, or percents. You can also grade by categories. To see how to set your grade book marks, categories and views, see manual “PLS - Grade Book Settings 7-6-15.”
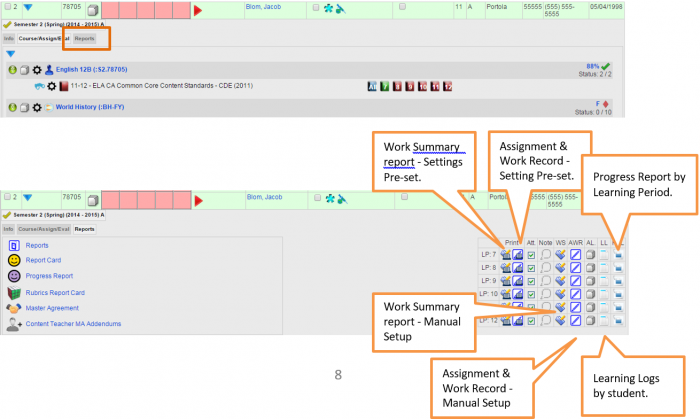
F. Printing Monthly Student Reports
Access student reports by clicking on the Reports tab for an individual student.