Inter-District Transfers
PART I Administration at Original School
- 1. Go to Admin> Student Info. » Find/ Add Student
- 2. Search for student to be transferred and Click 'Enr' for that student
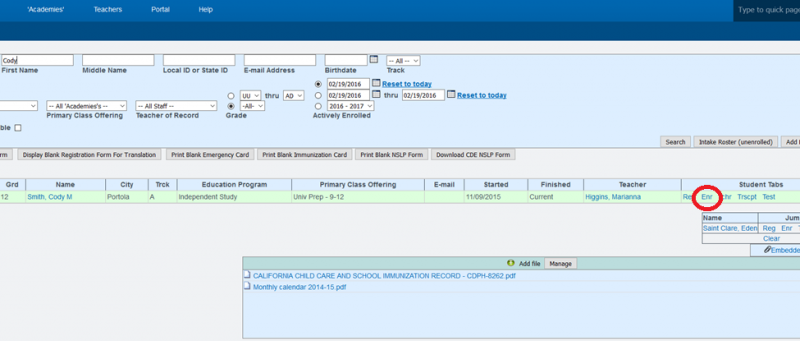
- 3. Click on Edit for the current enrollment.
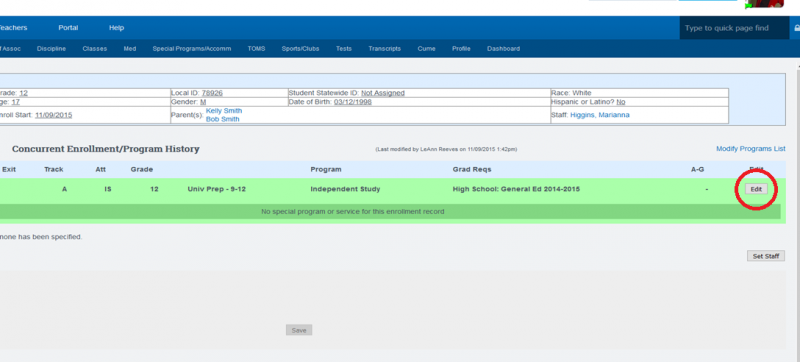
- 4. Complete the following steps
- a. Insert a Finish Date
- b. Check the box titled “Close Records”
- c.Choose the State Exit Code (Transfer California Regular or choose appropriate)
- d.Choose appropriate Class ending status for student from dropdown
- e.Save Record
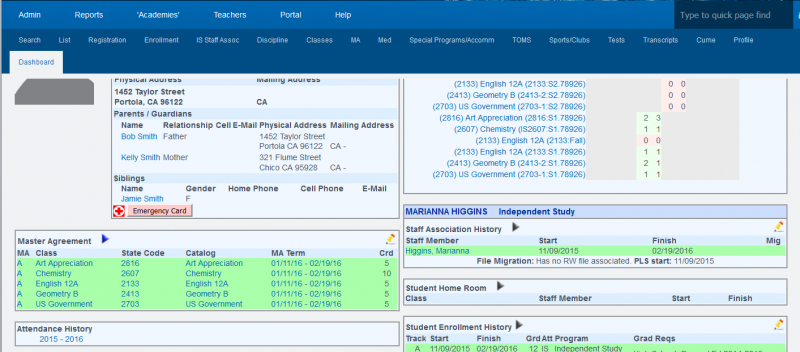
- 5. Go to Student Dashboard
- a. Choose the pencil to edit in the Student Enrollment History Area
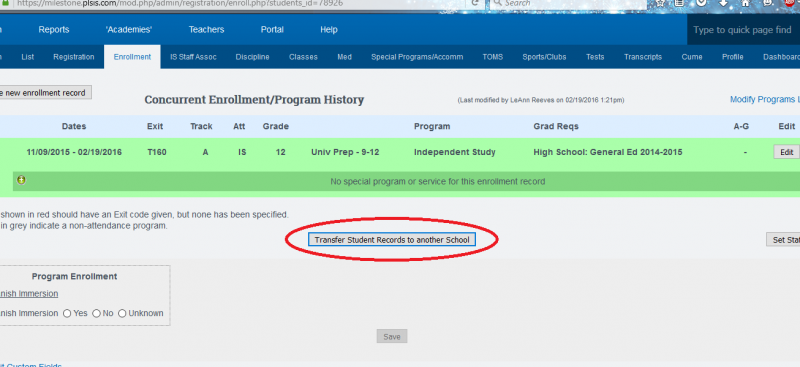
- 6. Choose Edit on enrollment record
- 7. Make sure state exit code and finish date are entered then SAVE
- 8. Click on Transfer Students Records to Another School

- 9. Enter scope name into Transfer to Scope: (check with School Pathways for correct scope title)
- 10. The students file has now been sent to the new school.
- 11. To view the status of the transfer, you may either click on a. Go to the Transfer Students section or b. Admin> Student> Info» Inter-District Trans *After this process is finished the transferred student must be pulled into the new school. Please see PART II for full instructions.
PART II Administrators at New School
- 1. Go to Administration» Student Info. » Inter-District Transfers
- 2. A list of students will be shown
- 3. Choose Retrieve now under Action
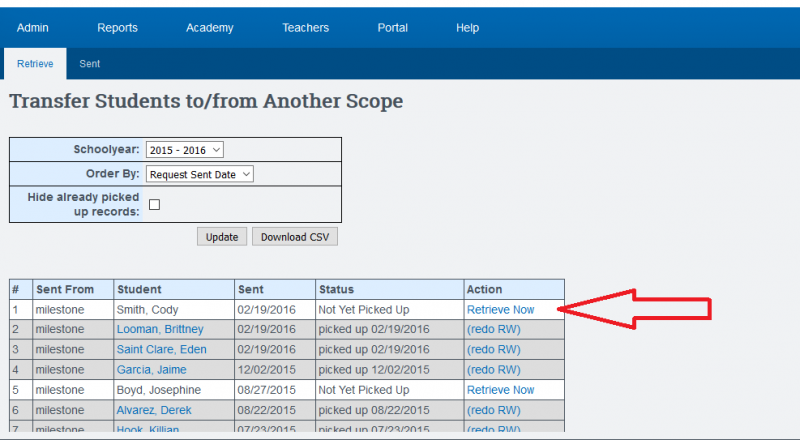
- 4. Choose the following to retrieve the file
- 5. Go to that Students Dashboard
- 6. Create new enrollment record. Add date, program etc. and SAVE
- 7. Create Staff Association
- 8. The student is now within the new school. HOWEVER, classes and master agreements must be recreated in this new school.
— Last Updated by Max Williams on 2016/03/07 18:24